This week we’re switching pens! After the past week and a half of using a regular pen or pencil, we’re going to explore lettering with a calligraphy pen. There are a few different ways to use a flat-nib pen, and we before we get too far, we’re going to practice some basics.
Work at the right size.
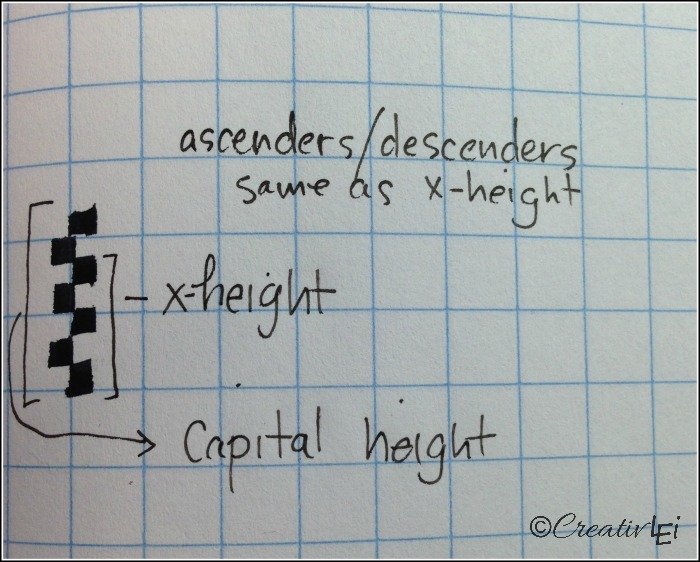
Use the pen to decide what size you’ll work at. The width of the nib shows you what your x-height (5 nibs high), cap-height (7-7.5 nibs high), and ascenders and descenders (same as x-height) should be.
It’s all about the angle.
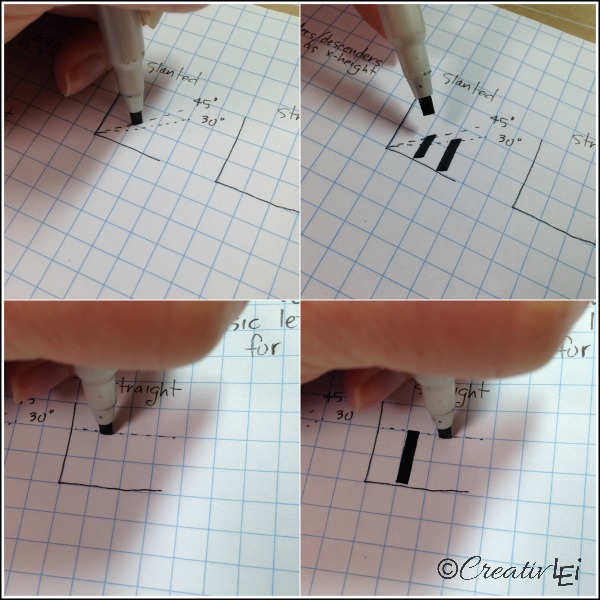
Learning the appropriate angle for the flat-nib pen is the first step, and the most important for using a calligraphy marker. You can use the flat-nibs at a 30-45* angle for a slanted pen or parallel to your base line for a straight pen.
Laying a foundation of basic letter forms.
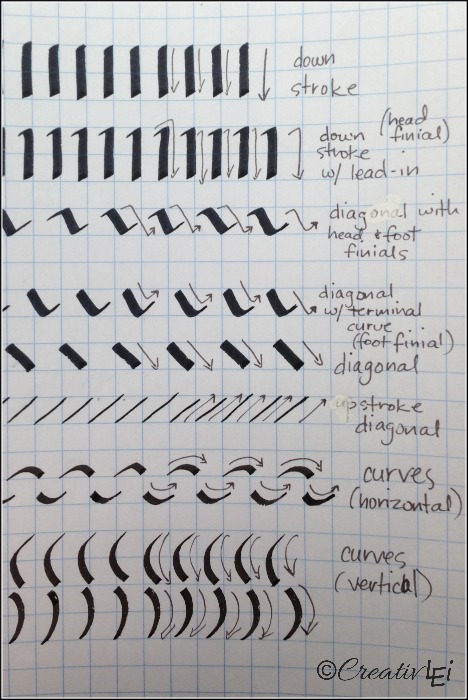
Remember the letter forms we practiced with our regular pens? Now we’re revisiting those forms with a flat-nib pen. I’ll be using calligraphy markers for this week. You could certainly use a dip-pen for these exercise, but I find that a calligraphy marker offers a lot of forgiveness while learning. The markers are also very helpful for lefties, like myself.
First I made a page of practice with a slanted pen.
Once you decide on the angle to hold the nib, use that same angle throughout. Do not twist the pen in your fingers, instead move your hand/arm.
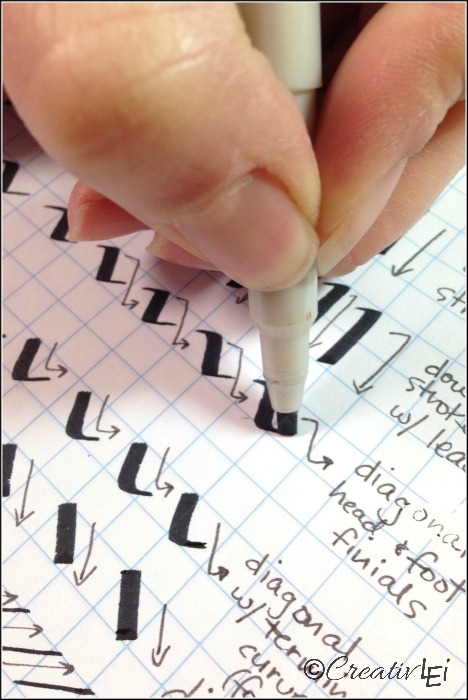
Then I made a page of straight pen practice.
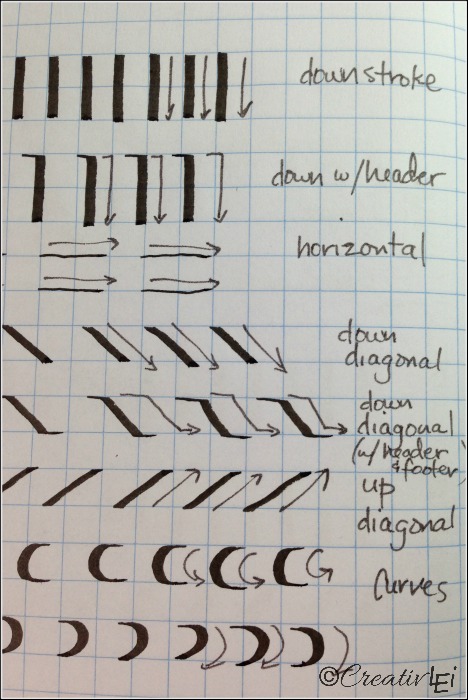
Each of these angles will be used to create different lettering looks throughout the week.
Here is this assignment’s demonstration:

**You can find all of the previous assignments on the series index page here (or by clicking on the image above). A list of basic lettering supplies can be found in this post.**
