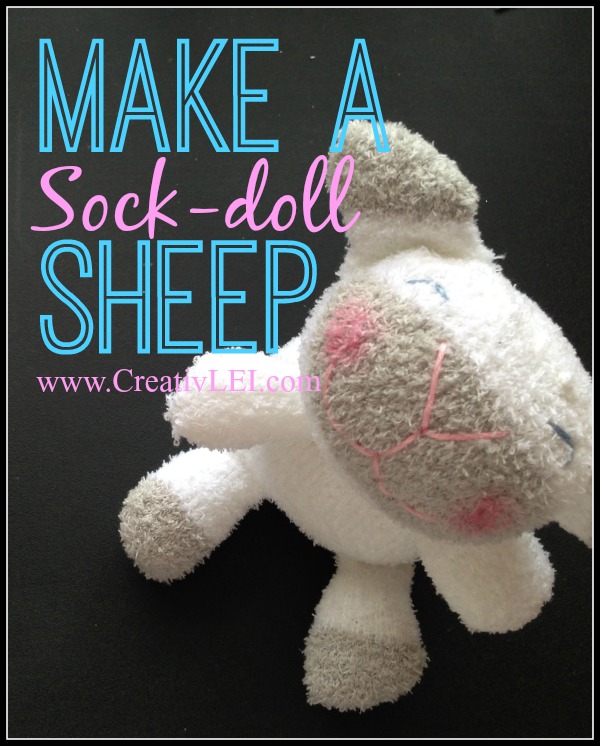
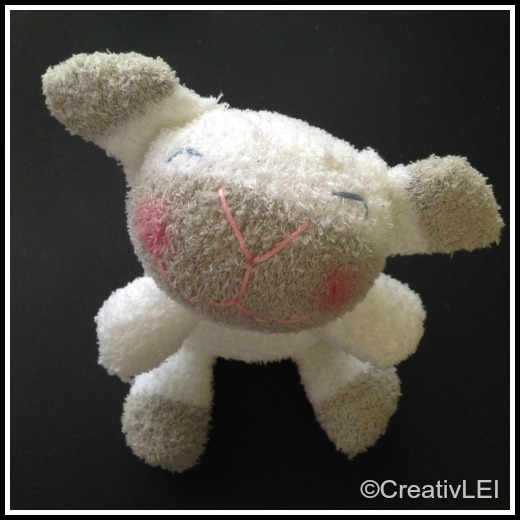
I have been stocking up on socks since before last Christmas. It isn’t (just) because my children have a knack for running through droves of them… I was stockpiling for making sock-dolls. As Easter approached I finally cut into my stash to create bunnies. After a couple of bunnies the design morphed into making my own sheep sock-doll.
Many of the links to products I’ve used are affiliate links. Making a purchase through these links will not cost you anything, the vendor pays me a small commission for the referral.
The books that were my inspiration were these:
Once you start creating with socks your imagination begins to run wild!
Here’s how to make your own sock-doll sheep:
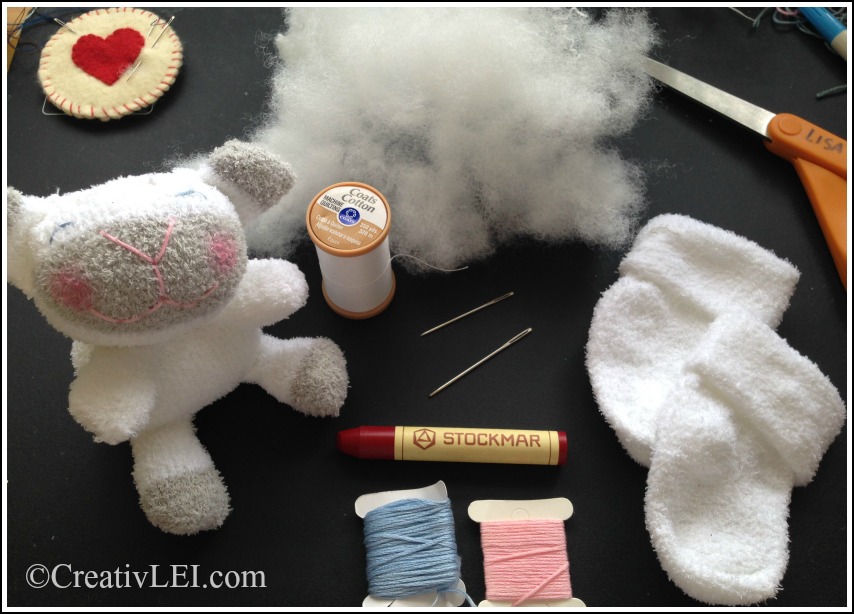
Gather up the supplies.
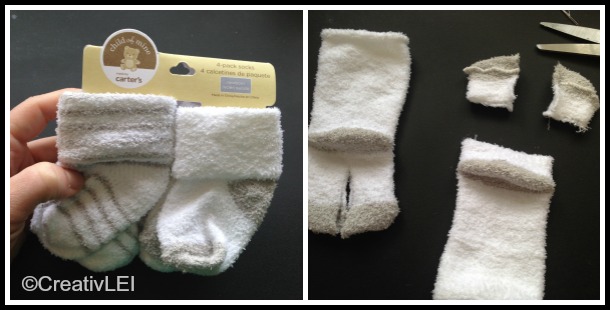
This sock-doll uses the fuzzy chenille infant socks. You can find a variation of them at Target or Walmart, or you can find them on Amazon. These or these striped socks would work great. Just be sure they are chenille and NOT terry. You’ll also need embroidery floss in your choice of colors, thread to sew it all together that it the same color as your sock if you want to hide the stitches, and sewing and/or embroidery needles. You will also need stuffing. I used PolyFill because I wanted to use something that was machine washable and wouldn’t compress over time. I use pure wool for my cloth dolls, but they are hand-wash only. I also used a beeswax crayon to blush the cheeks. A disappearing marking pen is helpful for marking out the face for embroidering.
You’ll need one pair of socks for this project. One will serve as the head and ears, the other will be the body, legs, and arms.
Forming the head:
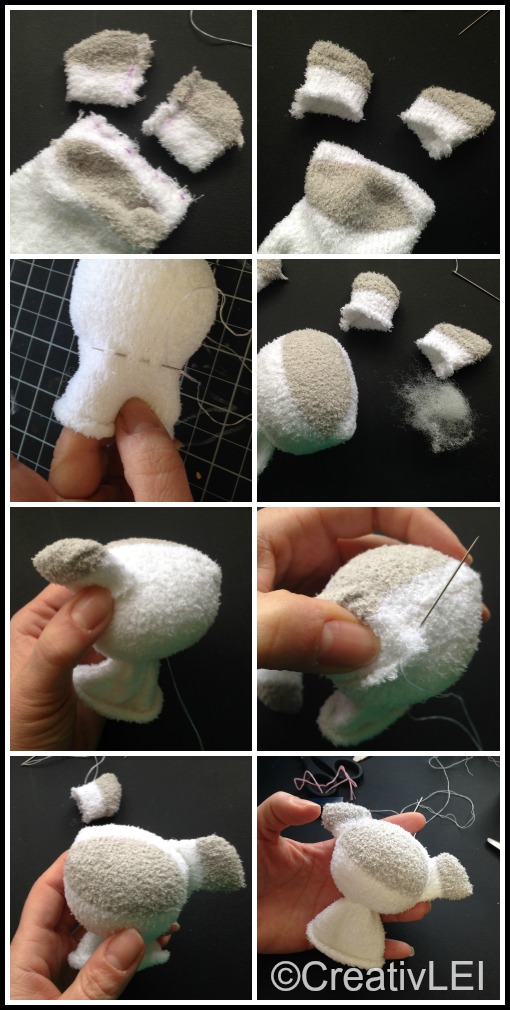
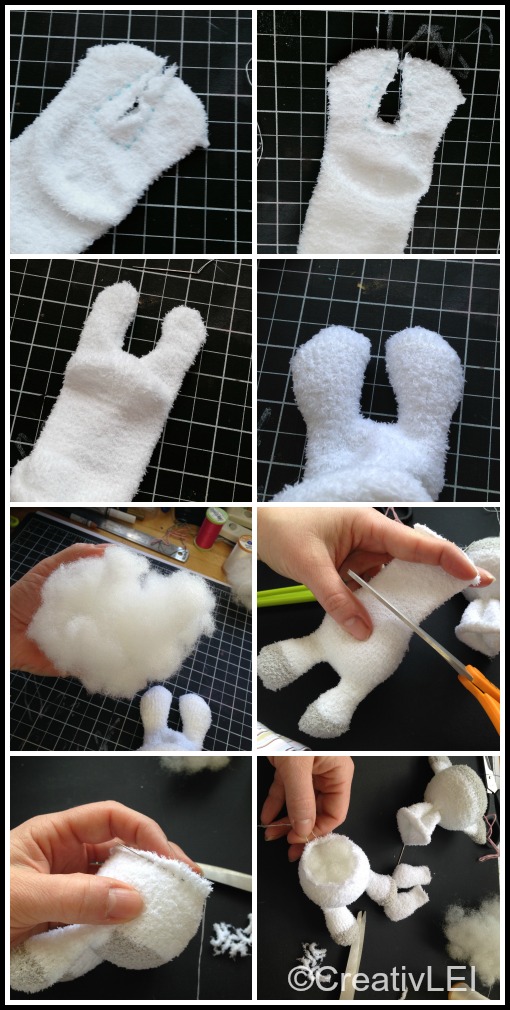
I do all the cutting and sewing with the wrong side out. You’ll cut off the toes of the ‘head’ sock, cut those in half and sew up the raw edge from the toe to the base. A back-stitch works well (feel free to check out FREE classes at Craftsy!). Also sew closed the top of the head using the back-stitch. Then turn all three pieces right side out. I used just a bit of stuffing in the ears, preferring them a little floppy. Stuff the head nice and round and do a running stitch to cinch in the neck. Cinch it tight and put a few stitches through the neck to sew it firm. Do not cut the extra neck fabric (we’ll tuck it into the body for stability).
Next form the body:
Sew up the raw edge to seam the legs with a backstitch. I like to angle the line to make bigger ‘feet’, just snip off the excess fabric. Turn it right side out and add stuffing to the feet. I like to push it down my the toes to leave the leg a little flexible. Then stuff the heel to create a nice round bum. Once it is stuffed to your liking, you’ll stretch the ankle of the sock to cut off the extra to create the arms. Run a running stitch around the raw opening that will be the neck. Do not cinch it yet, we need to prep the arms.
Creating the sock-doll sheep arms:
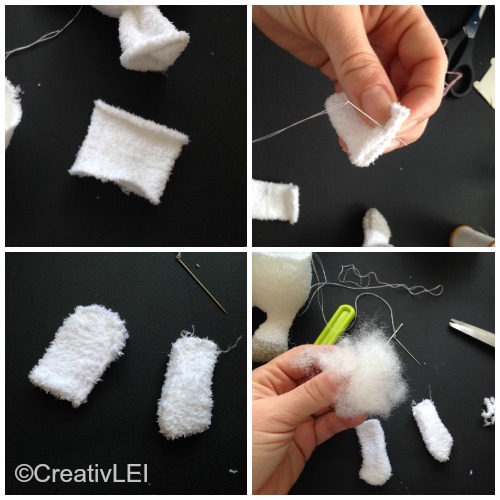
You’ll use the ankle section that you cut off to create the arms. Cut the piece in half, from raw edge to the sock cuff. Seam together the two raw edges, leaving the cuff end open to stuff. Turn the pieces right side out and add a little stuffing into the hands. Leave the top of the arms free of stuffing for ‘flopability’ (I’m almost certain that’s a word).
Putting it all together:
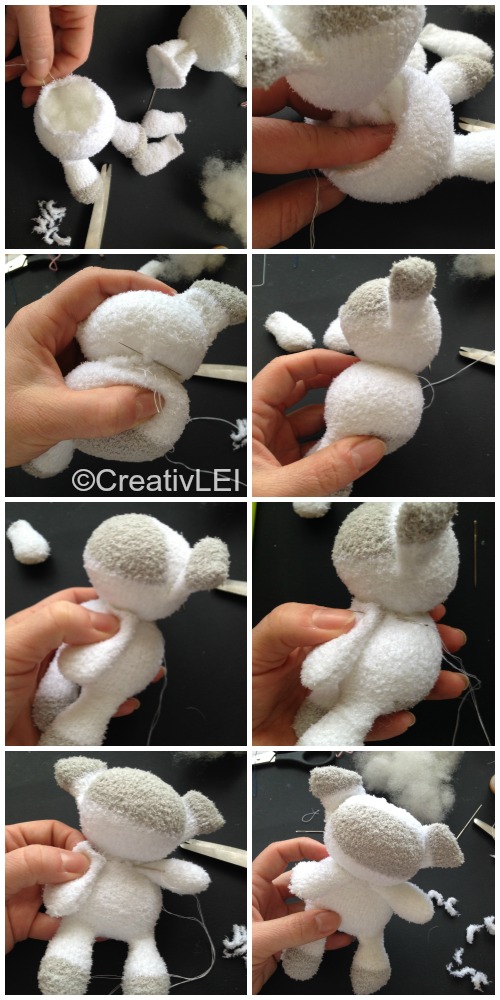
Now that all of your pieces are ready, you’re going to stuff the neck into the body. It’s a little finicky, keep at it. Then cinch the neck stitches and begin stitching the head and body together. Don’t worry about messy stitches, the chenille completely hides it. A hemming stitch works well, catching the stitches through both the head and body. You can go around a couple times to ensure it’s security. Once they’re firmly attached you’ll sew the arms on. You can pin them in place before stitching, but I found it easy enough to just hold them where I wanted and run back stitches through them attaching them to the body close to the neck.
You’re all ready to embroider the face. Don’t worry, it’s pretty easy.
Embroidering the face:
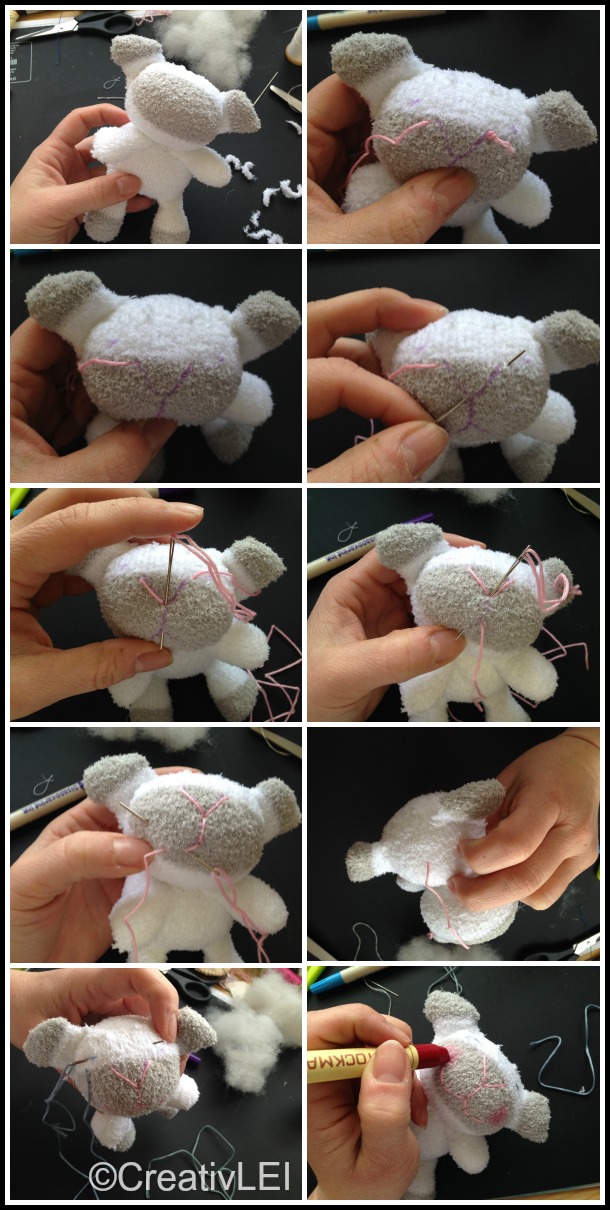
You can use the marking pen to sketch out where you want to add the feature. I used a wide V for the nose and a smile. The eyes were shallow inverted V’s. I found that I could easily pull a knot through the right side to secure the end, and when I was finished with the features I could pull the thread through the back of the head, hiding the knot through the sock. Use a baby wipe or wet paper towel to remove any visible marks from the marking pen. Once the fabric is dry, use the red beeswax crayon to blush the cheeks for total cuteness.
Wow. Just wow. Absolutely amazing. And they are the absolute cutest!!!
This pattern is my favorite sock stuffy now! Going to try it with my kids, thank you for sharing!!
It’s my pleasure. Once you start making them, it’s hard to stop! 😉