
You all have been amazingly patient while I’ve been on a short (too long) blogging hiatus while we prepared our house for the market. I’m so excited to jump back in with you all and share some of what’s going on behind the scenes here, but first… Let’s get back to some mail art!
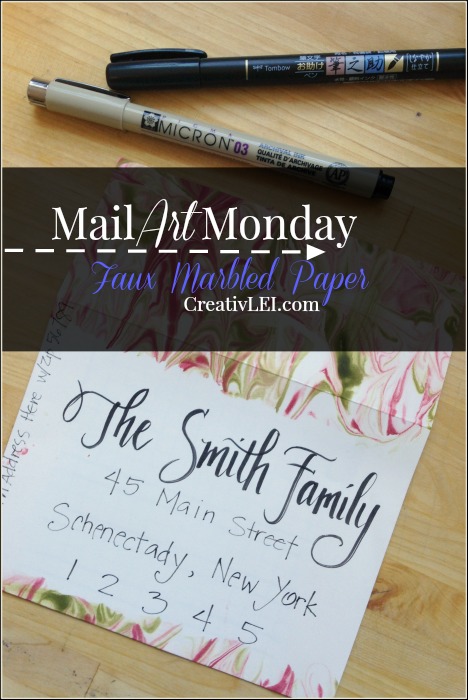
When you experiment with lots of different art media, you end up with a number of supplies and the need to find ways to use them in a variety of ways. Here’s one more way to dress up some #happymail.
**This post contains affiliate links, please read my full disclosure statement for more information.**
Do you love the look of fine marbled paper? Me, too… Unfortunately, I just don’t have it in the budget to always splurge on handmade paper.
With some shaving cream and colored re-inkers you can create a faux marbled look!
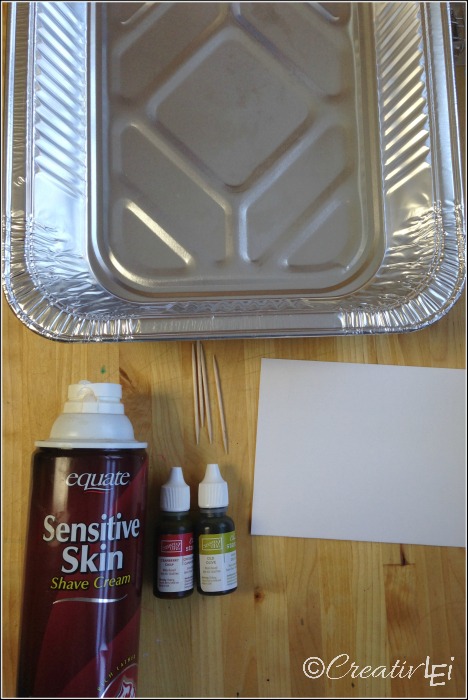
You’ll want a baking pan or styrafoam tray to work in. This is a messy technique, but the results are really beautiful. Grab a can of shaving cream (nothing fancy, store brand will do), colored re-inkers (Don’t have bottles of ink around? No problem! Use liquid food coloring!), toothpicks, and a blank envelope. You’ll also need a few sheets of paper towels.
Randomly squeeze out drops of color over the shaving cream. Leave white space, you can always add more color if needed!
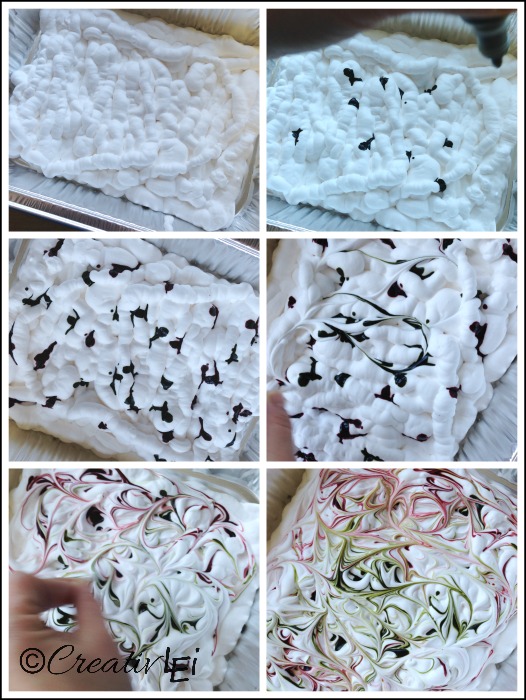
Use a toothpick or skewer to swirl the color through the shaving cream. I like to make figure eight motions. Start big and then get smaller, until you start to see swirls emerge.
Now the palette is ready for your envelope (or paper).
Place the envelope on waxed paper or another baking pan and use paper towel to wipe off the shaving cream. The color will have transferred to your paper!
Dip a little bit of the bottom of the envelope, too. You can even dip a whole sheet or scraps of cardstock.
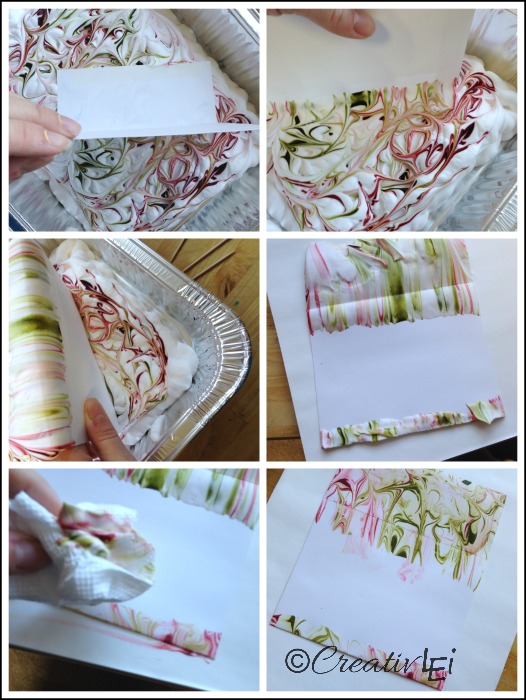
Wipe off all the excess shaving cream. Watch your fingers, they like to carry the color to places you don’t want it. Allow the ink to dry before addressing the envelopes. If you’ve left white space, you can swirl what’s still in your tray and dip another envelope or few.
I dipped the flap and a bit of the top of the envelope.
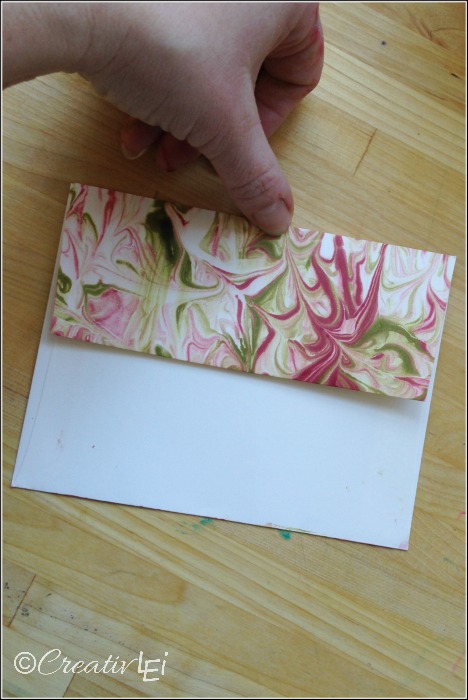
Just be careful to not over do the swirls and turn your colors to mud.
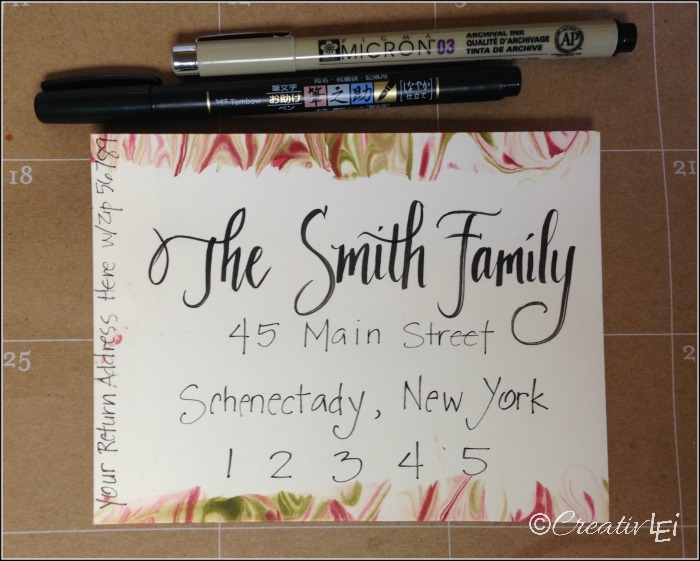
Once dry, address your envelope in any style you prefer. I start with the zip code to center the address, and then work my way up. Leaving the names until the last step.
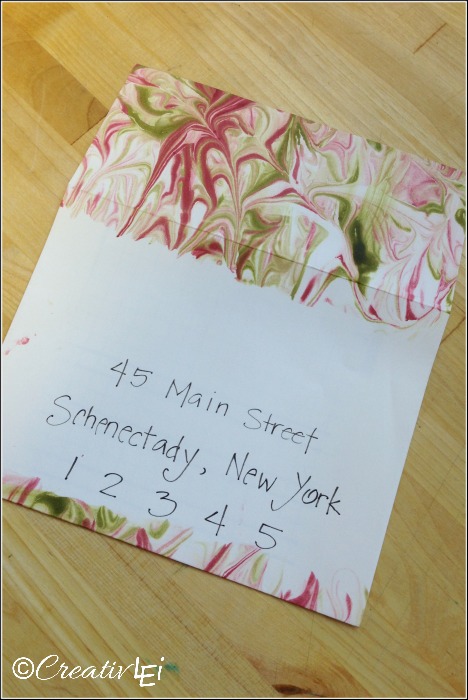
I love the combination of brush lettering with my soft tip brush marker (Tombow makes my favorite!) and simple print with a fine tip pen.
Here’s the demonstration of this fun (but messy) technique from Periscope.
Do you think you’ll give this technique a try?


LISA, that is SO cool!!!!
Thanks, I hope you’ll give it a try. Be sure to tag me if you do. 😉
What a great technique! Thanks for sharing this.
I’m so glad you enjoyed it!
Lisa, Excellent periscope last night!!!! Thank you so much for sharing. You ROCK. I so want to do this this weekend. 🙂
Thanks so much! It was a fun one!
Lisa, You continue to amaze me with your skills. Thank you so much for sharing this fun technique. I can see my daughter and I having a fun time with this. Just a side note and I don’t really know what you can do about it, but it’s very difficult to see what you are doing because all of the comments are constantly covering up your work space. If there is anyway you could move as far to the right as possible of the screen it would be helpful. Please don’t take that as criticism. It’s just so helpful to watch you work and frustrating when you can’t actually see. Thanks again for sharing your amazing gifts with us.
Thanks so much Wendy. This is certainly a fun technique. Glad you enjoyed it and I hope you’ll try it!