After practicing penmanship basics, it’s time to have some fun! Up until now we’ve been really focusing on refining our letter formation by using some of the rules of letter making. Now we’re going to bend the rules a bit.
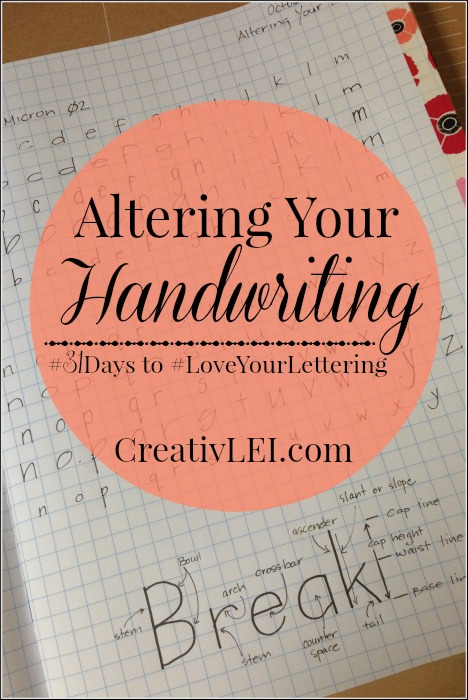
Making small changes to the foundation of your handwriting to develop style.
In the basic shape assignment, I challenged you to isolate the different fragments that make up letters and practice them.
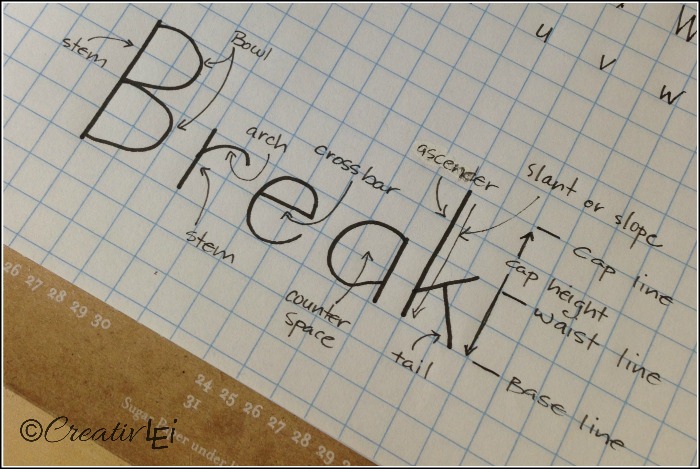
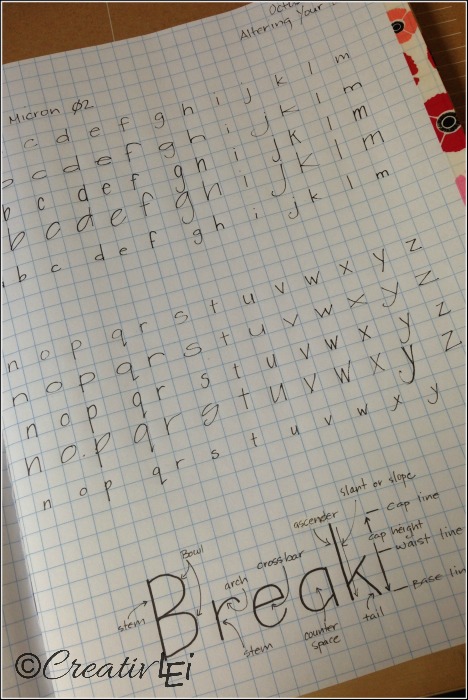
Each of those parts has a name. On the bottom portion of your page, it might be helpful to add in this diagram. It’s missing descenders, which are pieces of the letter that fall below the base line. See if you can pick out a different word to label and be sure to tag it (#LoveYourLettering) if you share it on Instagram!
For this exercise, I started with my natural print and placed one letter in each box, about halfway down the page I added a line for the remainder of the alphabet. How many letters you fit across will depend on which paper you’re using.
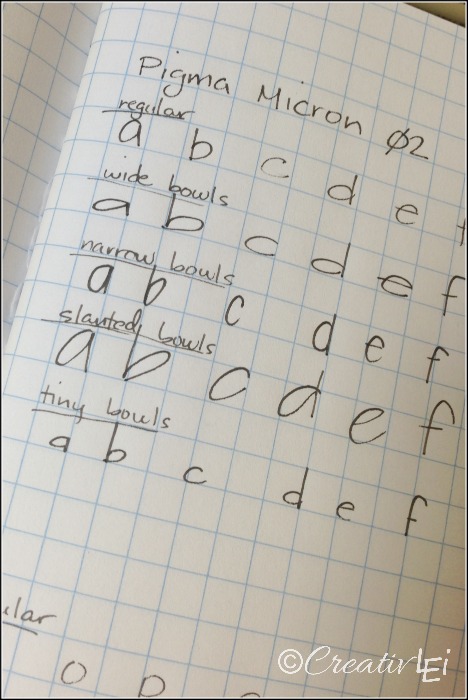
I made a line full of each variation I tried. Wide bowls, narrow bowls, slanted bowls, tiny bowls. We’ll add whimsy tomorrow, today I’m just focusing on altering the basic components of the letters.
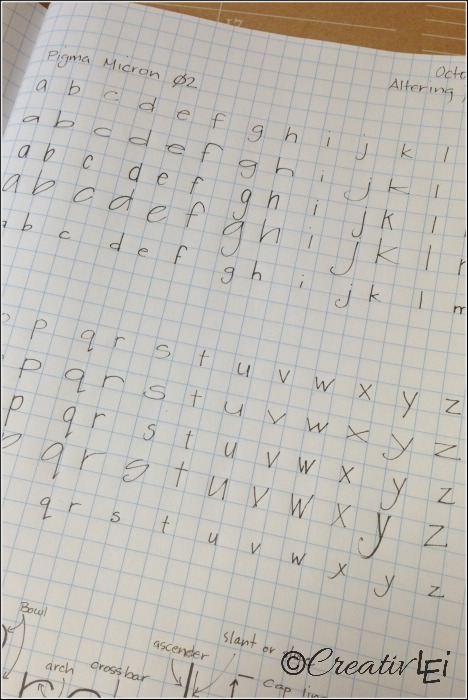
They may not look very different, but if you start to mix these variations within words of lettered pieced, you’ll start to see personality develop… but more on that later in the week.
Let’s keep these assignments short and do-able!
Video demonstration for Altering Your Handwriting:
I don’t want this to be intimidating. Are you having fun with this?
For those of you joining us this week and wondering where the ‘supply list‘ is, you can find it in this post. However, you can get started with any pen (or pencil) you’re comfortable with using. Most of the techniques we’ll talk about this month can be practiced with tools you already have.
Not intimidating at all! I’m excited to get home tonight and do this exercise 🙂
Lisa, Do we use the backs of the pages?
Sometimes I do. Since we’ve doubled the pages using washi tape, there shouldn’t be any bleed through issues, especially for these assignments. These are your practice books, so you’re free to use them in a way that makes the most sense for you. 🙂
1. Did you record your last periscope meetup. I missed it.
2. I’m having trouble imagining certain shapes In this lesson. Example: slanted bowl mns. Are these not slanted because they don’t have bowls? Or can you show an example of how you do them?
You’re correct, I didn’t slant them because they don’t have bowls. If I was writing at a bigger point size, the arch of the stems might show more slant. I’ll be sure to draw an example on tonight’s scope. Remind me if I start to forget. 😉 I’m going over to Katch to find the previous feeds to add to the past posts. Thanks for the helpful nudge. 🙂
How are slant/slope and “stem” different?
The stem is the actual part of the letter. The slope/slant is the angle of the stem. Does that make sense?
I’m LOVING it!! I love how you’re breaking the assignments into small sections that are easily finished each day. I can see my handwriting changing already. While taking notes in Sunday School 2 days ago, I found myself practicing! Don’t worry…I didn’t miss any important note-taking 🙂
Thank you so much for doing this…for sharing it with us out of love and not for money <3 <3 <3
Thank you so much. I find that doodling while I’m listening (to a sermon or a training of any kind) actually helps me listen better. My intention was to break it down into very easy to follow pieces, so that everyone would be willing to try it out and not feel like they needed to be an artist to get started. It’s my pleasure to share this series with you all as it teaches me how to put together lessons and information that will be of value for you all, and to grow in the future.
What is the difference between a stem and an ascender, as in the B and k?
Hi Debi, the stem is the straight line that begins the letter (think of the other parts as branching off), an ascender is the portion of the stem that rises above the waist line (b, d, f, t, l, k, h…), the descender is the portion of the stem that dips below the base line (p, g, q, j…). Does that help clarify?
My 13 year old daughter and I are having fun together and learning a lot! Thank You so much for taking time out of your BUSY life to share your creative gifts!!!!
Thank you so much for your encouragement and compliment.
I’m having problems with slanted letters. Can you make a printable page with slanted letters so I can print it out to practice?
This has been alot of fun and I’m learning alot. Glad you are starting with the basics!
Hi Barbara, I will see what I can do over the weekend. Thanks for being patient.
Thank you so much! You are helping my handwriting already. I used to have pretty penmanship and then I got lazy and stopped writing neatly (more like scribble it down as fast as I could). This is really helping me slow down and care about me writing.
Thanks, Kim. I’m glad it’s helpful. I still have some quick, scribble writing, but really love practicing penmanship.
Hi Lisa! What would the anatomy of a S or C be?
Those would be called spines. Great question!
This was so much fun! Off to practice variations of these! yay!
Glad you’ve enjoyed it. Thanks for joining!
where can I find the rest of this video?
Hi Leah, unfortunately these were captures from older Periscope broadcasts prior to Periscope saving all scopes. This winter I will re-film this series in the same manner that the LYL2 series has been done on YouTube. Thank you so much for your understanding and patience.